We recently wrote an updated version of this tutorial to cover the Strong Customer Authentication requirement for online payments.
We recommend checking out the following 2 tutorials in place of this 3-part tutorial:
As a reminder, this tutorial is broken up into 3 parts:
PART 1: Provides a general overview and demonstrates how to create subscription plans via the Stripe Dashboard.
PART 2: Goes into best practices when it comes to setting up your workspace with Node, Express, the Stripe API, etc.
PART 3 (You're here): Shows you how to use the customer's inputted card number to create a Stripe Token, Customer, and Subscription.
You can find all of the code posted here at:
https://github.com/code-nebula/stripe-recurring-subscriptions
You might notice that some of the code in our repository isn't featured in this tutorial. That's because the repository includes code for
- An Admin View — Where you can create "Products" and "Plans" through the Stripe API. We'll be covering how to do this in a separate blog post.
- A Client View — Where your users can view and pay for your "Plans". We are covering how to set this up in this tutorial.
If any of these Stripe terms are unfamiliar to you, don't worry, they're covered in Part 1.
We last left off with a request to render the "signUp.html" page. Now we will actually code up that page.
It will look like
6. Set up Your Payment Form & Create a Stripe Token
First, we'll need to set up a form where your customer can enter their credit card information.
For security purposes, we'll want to avoid actually sending that raw credit card information to our server. Stripe understands this security concern and thus offers a few options for securely collecting that data client-side.
For the purposes of this tutorial, we'll be using Stripe Elements to handle card information.
If you remember from the last part, we included the Stripe client-side library in our "views/base.html" file. We included it in the "base.html" file as opposed to just on our sign up page, "signUp.html" because Stripe recommends we include this library on every page of our site to best protect against fraud.
<script src="https://js.stripe.com/v3/"></script>
Because all our HTML files extend "views/base.html", we have access to this library in our "signUp.html" file.
Let's move on to setting up this file:
If you'd prefer to see the code all at once instead of as snippets down below, please check out this Github link:
https://github.com/code-nebula/stripe-recurring-subscriptions/blob/master/views/signUp.html
HTML section — views/signUp.html
Here, we take the passed-in parameters (product and plan) and access their relevant properties (product.name, plan.name, plan.amount, etc.). We do this to show the customer which product and plan they're signing up for. In the real version of the site, you would probably only show plan information (since the product represents the site).
Then we set up a conditional section that renders either a success or error message. Don't worry about this section right now -- it only becomes relevant after we submit the payment form, and our server sends us either a "success" or "error" parameter depending on how the payment was processed.
Next, we set up our payment form. As before, we're utilizing the power of hidden input fields to grab data about our product and plan -- we'll need this data when we
- Create a Subscription after the form is submitted and
- Re-render this page with a success or error message
Then we create a simple input field to capture the customer's email. Now comes the interesting part. We create a container div for our Stripe Elements instance:
<div id="card-element">
We do the same thing and create a container div for the error messages that the Stripe Elements instance sends us: <div id="card-errors" role="alert">
Lastly, we include an input of type "submit" to actually submit our form.
Javascript Section — views/signUp.html
Note: All of the Javascript except for the helper function stripeTokenHandler is wrapped in an if (document.getElementById('card-element')) conditional block because the sign-up page doubles as a confirmation page. In the confirmation page, we don't render the payment form (see the HTML code above with the success, else if error, and else blocks).
Since I'll be explaining the Javascript in many code snippets, I won't be including the wrapper conditional block below, but it's available on the Github page.
First, we'll invoke the client-side Stripe Javascript library by passing in our Publishable Test Key. Unlike our Stripe Secret test key, our Stripe Publishable test key is not confidential, so it's alright to include in your application code.
Then we create an instance of Stripe Elements.
    /* Replace with your publishable test key */
    var stripe = Stripe('pk_test_************************');
    var elements = stripe.elements();
Because the Stripe Elements instance is wrapped in an iframe, it is difficult to style all of it with our own CSS. However, Stripe accounts for this and let's us specify our own custom styles object so that the instance can match the rest of our form. Note that this styles object affects the inputs themselves, NOT the overall Stripe Elements container (that is handled in a CSS section below). The "base" property refers to the normal state, while "invalid" refers to the error state.
    /* Custom styling can be passed to options when creating an Element */
    var style = {
      base: {
        fontSize: '16px', '::placeholder': { color: "#aab7c4"},
        fontFamily: '"Open Sans", "Helvetica", sans-serif',
        fontSmoothing: 'antialiased',
      },
      invalid: {
        color: '#fa755a',
        iconColor: '#fa755a'
      }
    };
Next, we tell our Stripe Elements instance to specifically create the "card" element. The "card" element is a simple input field that features sections for the credit card number, CVC number, expiration date, and zip code.
We then attach, or mount, that Stripe Elements card instance to the div in our HTML with the id "card-element".
Then we set up an event listener on the card instance. It listens for any changes in the inputs and if an error exists, it populates the error within the '#card-errors' div.
    /* Create a Stripe Elements instance
    and mount to the div with the id 'card-element' */

    var card = elements.create('card', {style: style});

    card.mount('#card-element');

    /* Handle validation errors */
    card.addEventListener('change', event => {
      var displayError = document.getElementById('card-errors');

      if (event.error) {
        displayError.textContent = event.error.message;
      } else {
        displayError.textContent = '';
      }
    });
The following code intercepts the initial form "submit" event when we click the "Pay" button. event.preventDefault() prevents the form from being submitted and passing data to our Node server.
The next section introduces an important Stripe feature, tokenization.
Tokens are essentially how Stripe collects and abstracts sensitive card or bank information. Creating tokens on the client-side (as we will do with Stripe Elements) ensures that card information isn't passed to our server. If it were passed to our server, someone could potentially intercept or monitor the request and see the sensitive data being passed.
Tokens, however, are safe to pass since they are an abstraction.
Note that tokens cannot be used more than once. This is why, as you'll soon see, we'll need to create a Stripe Customer. We can attach a token as a payment source for the Customer and thus create recurring charges.
So in the code below, we call the createToken method from the Stripe client-side library and pass in our Stripe Elements card instance.
If there is an error, we populate the '#card-errors' div, otherwise we pass the successfully returned token to a helper function called stripeTokenHandler.
    /* Create a token when the form is submitted */
    var form = document.getElementById('payment-form');

    form.addEventListener('submit', function(event) {
      event.preventDefault();

      stripe.createToken(card).then(function(result) {
        if (result.error) {
          var errorElement = document.getElementById('card-errors');
          errorElement.textContent = result.error.message;
        } else {
          stripeTokenHandler(result.token);
        }
      })
    });
The stripeTokenHandler function essentially grabs the payment form and adds yet another hidden input field with the token value.
    function stripeTokenHandler(token) {
      var form = document.getElementById('payment-form');
      var hiddenInput = document.createElement('input');
      hiddenInput.setAttribute('type', 'hidden');
      hiddenInput.setAttribute('name', 'stripeToken');
      hiddenInput.setAttribute('value', token.id);
      form.appendChild(hiddenInput);
      form.submit();
    }
CSS Section — views/signUp.html
This code is taken directly from the Stripe Elements Quickstart CSS portion. It is used to style the Stripe Elements container, not the actual inputs (which is what the custom styling above was used for).
      /* This CSS is taken from the Stripe Elements Quickstart Guide (https://stripe.com/docs/stripe-js/elements/quickstart).
       * It is used to style the container, not the actual inputs inside */
      .StripeElement {
        box-sizing: border-box;
        height: 40px;
        padding: 10px 12px;
        border: 1px solid transparent;
        border-radius: 4px;
        background-color: white;
        box-shadow: 0 1px 3px 0 #e6ebf1;
        -webkit-transition: box-shadow 150ms ease;
        transition: box-shadow 150ms ease;
      }

      .StripeElement--focus {
        box-shadow: 0 1px 3px 0 #cfd7df;
      }

      .StripeElement--invalid {
        border-color: #fa755a;
      }

      .StripeElement--webkit-autofill {
        background-color: #fefde5 !important;
      }
7. Create a Customer and Subscription
As I mentioned above, we'll need to attach the token to a Stripe Customer. Let's go back to our "stripe-functions.js" file and create a helper function to handle this logic.
We will create a new function called createCustomerAndSubscription which will chain the process of creating a customer from a token and then creating a subscription from a customer.
We call stripe.customers.create() (API docs)
and pass in the customer's email and the token.
(Note that we specify the token as a "source". A "source" in Stripe terminology is essentially a representation of a customer's payment method. They can be tokens as well as other things.)
Once we've created a customer, we take the result (a Customer object) and call another Stripe API method, stripe.subscriptions.create (API docs). We pass in the customer id and create a plan object in the itemsarray. Notice that we are essentially connecting a Customer to a Plan! (Remember the diagram in Part 1)?
api/stripe-functions.js
      function createCustomerAndSubscription(requestBody) {
        return stripe.customers.create({
          source: requestBody.stripeToken,
          email: requestBody.customerEmail
        }).then(customer => {
          stripe.subscriptions.create({
            customer: customer.id,
            items: [
              {
                plan: requestBody.planId
              }
            ]
          });
        });
      }
Now we're ready to export this function and use it -- make sure your "module.exports" at the bottom of the file looks like this:
      module.exports = {
        getAllProductsAndPlans,
        createCustomerAndSubscription
      }
app.js
Now that we've set up our helper function to create a Stripe Customer and Subscription, let's see how it's used when our sign-up page is submitted.
First we create product and plan objects that will be passed back as parameters in the confirmation page (recall that "signUp.html" doubles as a sign-up and confirmation page).
Next we invoke the createCustomerAndSubscription method and pass in req.body as the function parameter -- this is because the request body contains the token and plan information.
If the creation of a customer and subscription is successful, we render the sign-up page again, but now with a success parameter. Otherwise, we render the sign-up page with an error parameter.
    router.post('/processPayment', (req, res) => {
      var product = {
        name: req.body.productName
      };

      var plan = {
        id: req.body.planId,
        name: req.body.planName,
        amount: req.body.planAmount,
        interval: req.body.planInterval,
        interval_count: req.body.planIntervalCount
      }

      STRIPE_API.createCustomerAndSubscription(req.body).then(() => {
        res.render('signup.html', {product: product, plan: plan, success: true});
      }).catch(err => {
        res.render('signup.html', {product: product, plan: plan, error: true});
      });
    });
And now we're set to test our form out!
Run your application via npm start and once again, navigate to localhost:3000/customerView.
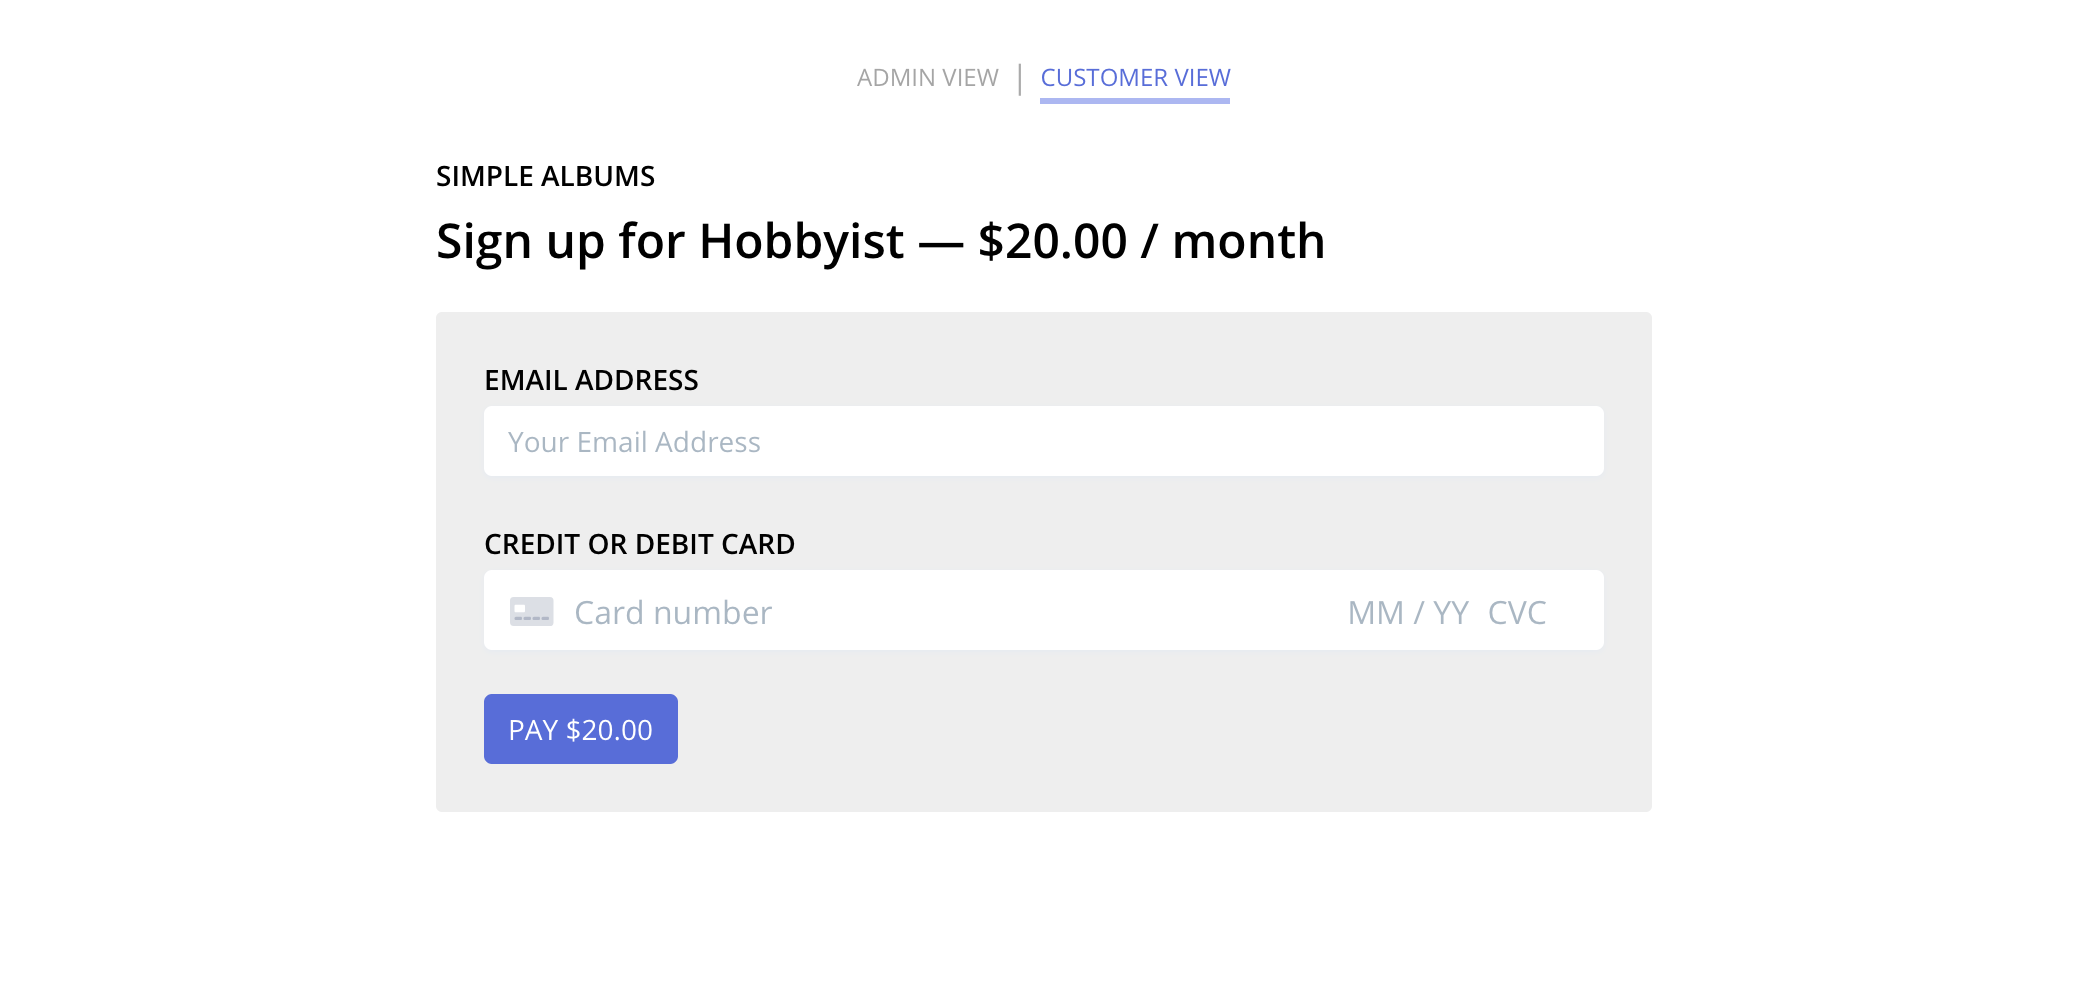
Click the "Sign Up" button on either of the plans. You should then see the payment form
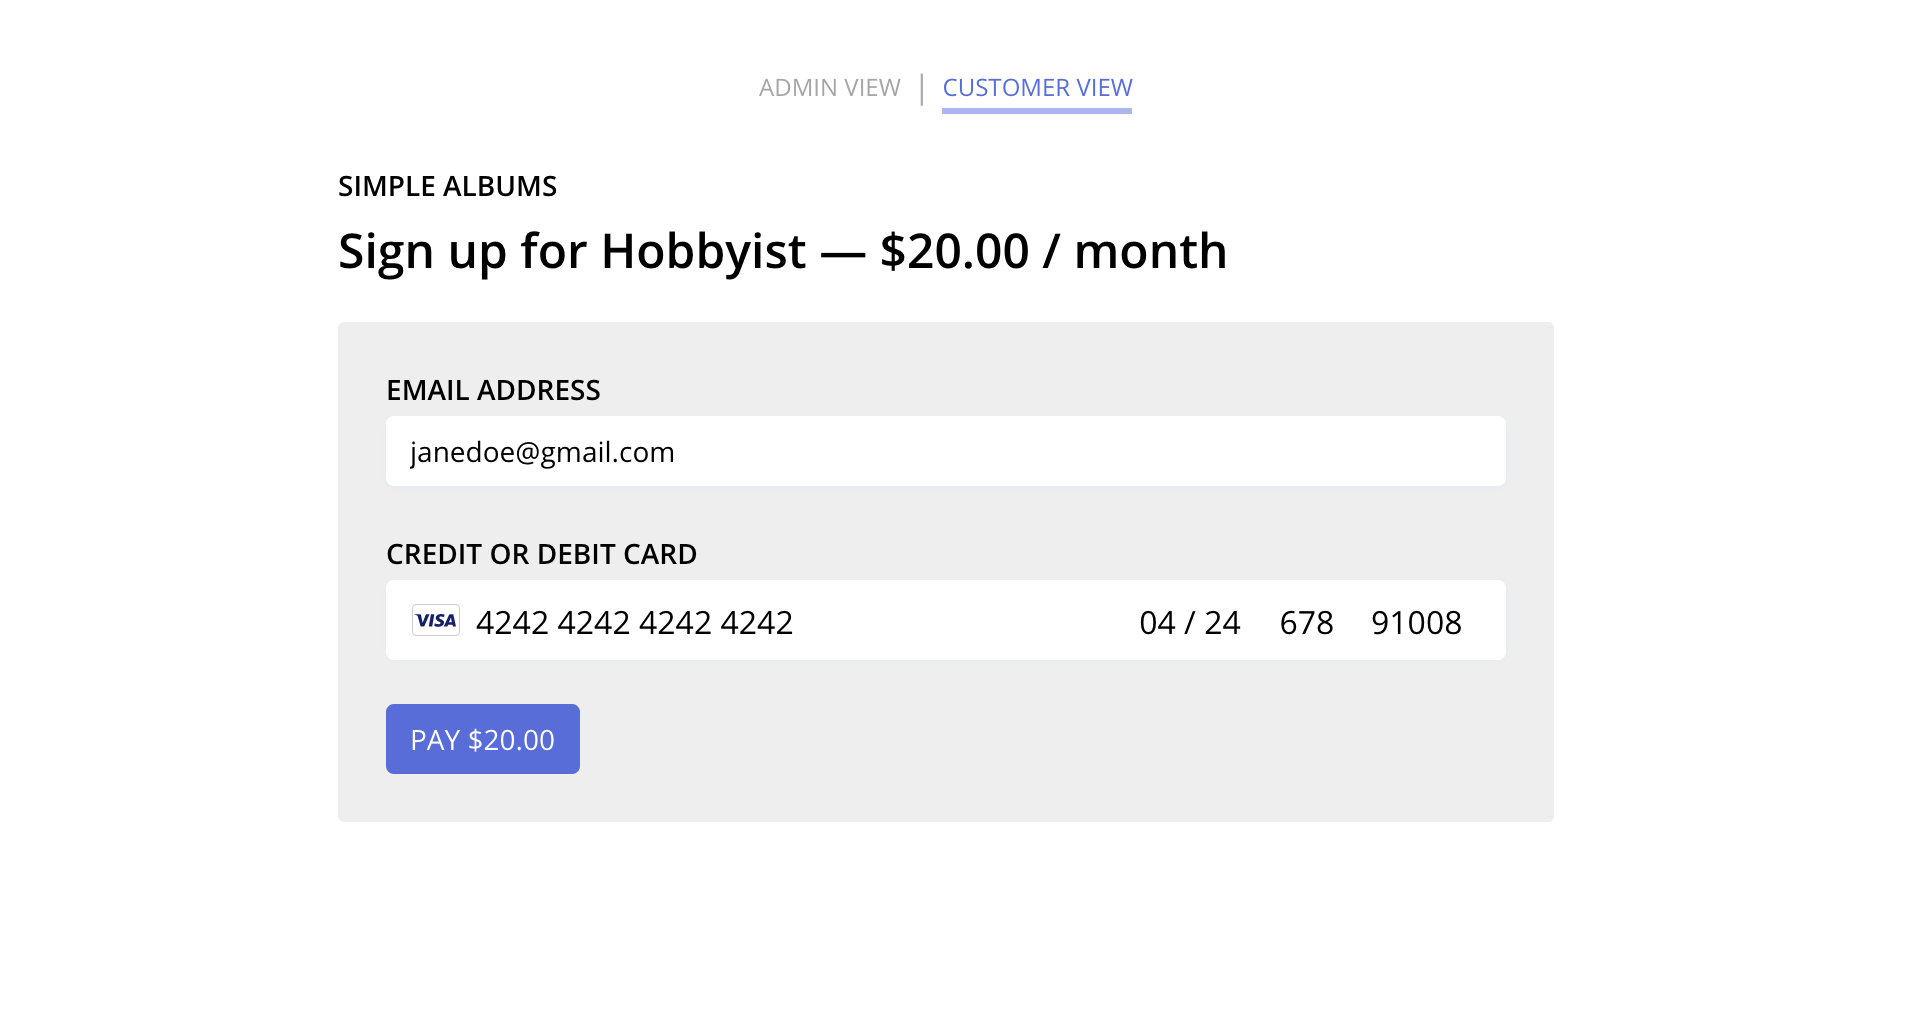
Enter any email and enter Stripe's test number 4242 4242 4242 4242. Then choose any CVC number, future expiration date, and U.S. ZIP code.
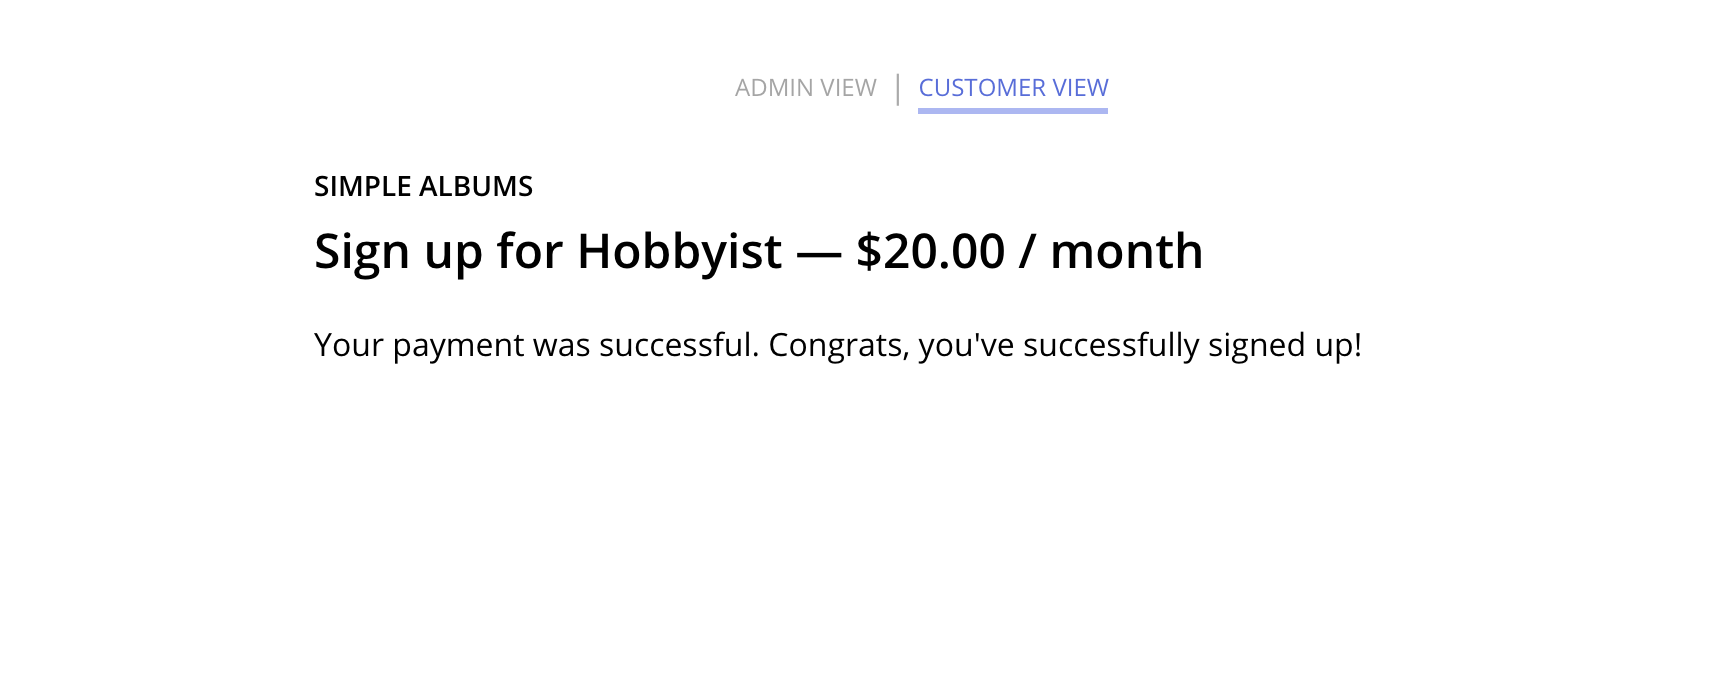
Hit the "Pay" button, and you should see the following success page:
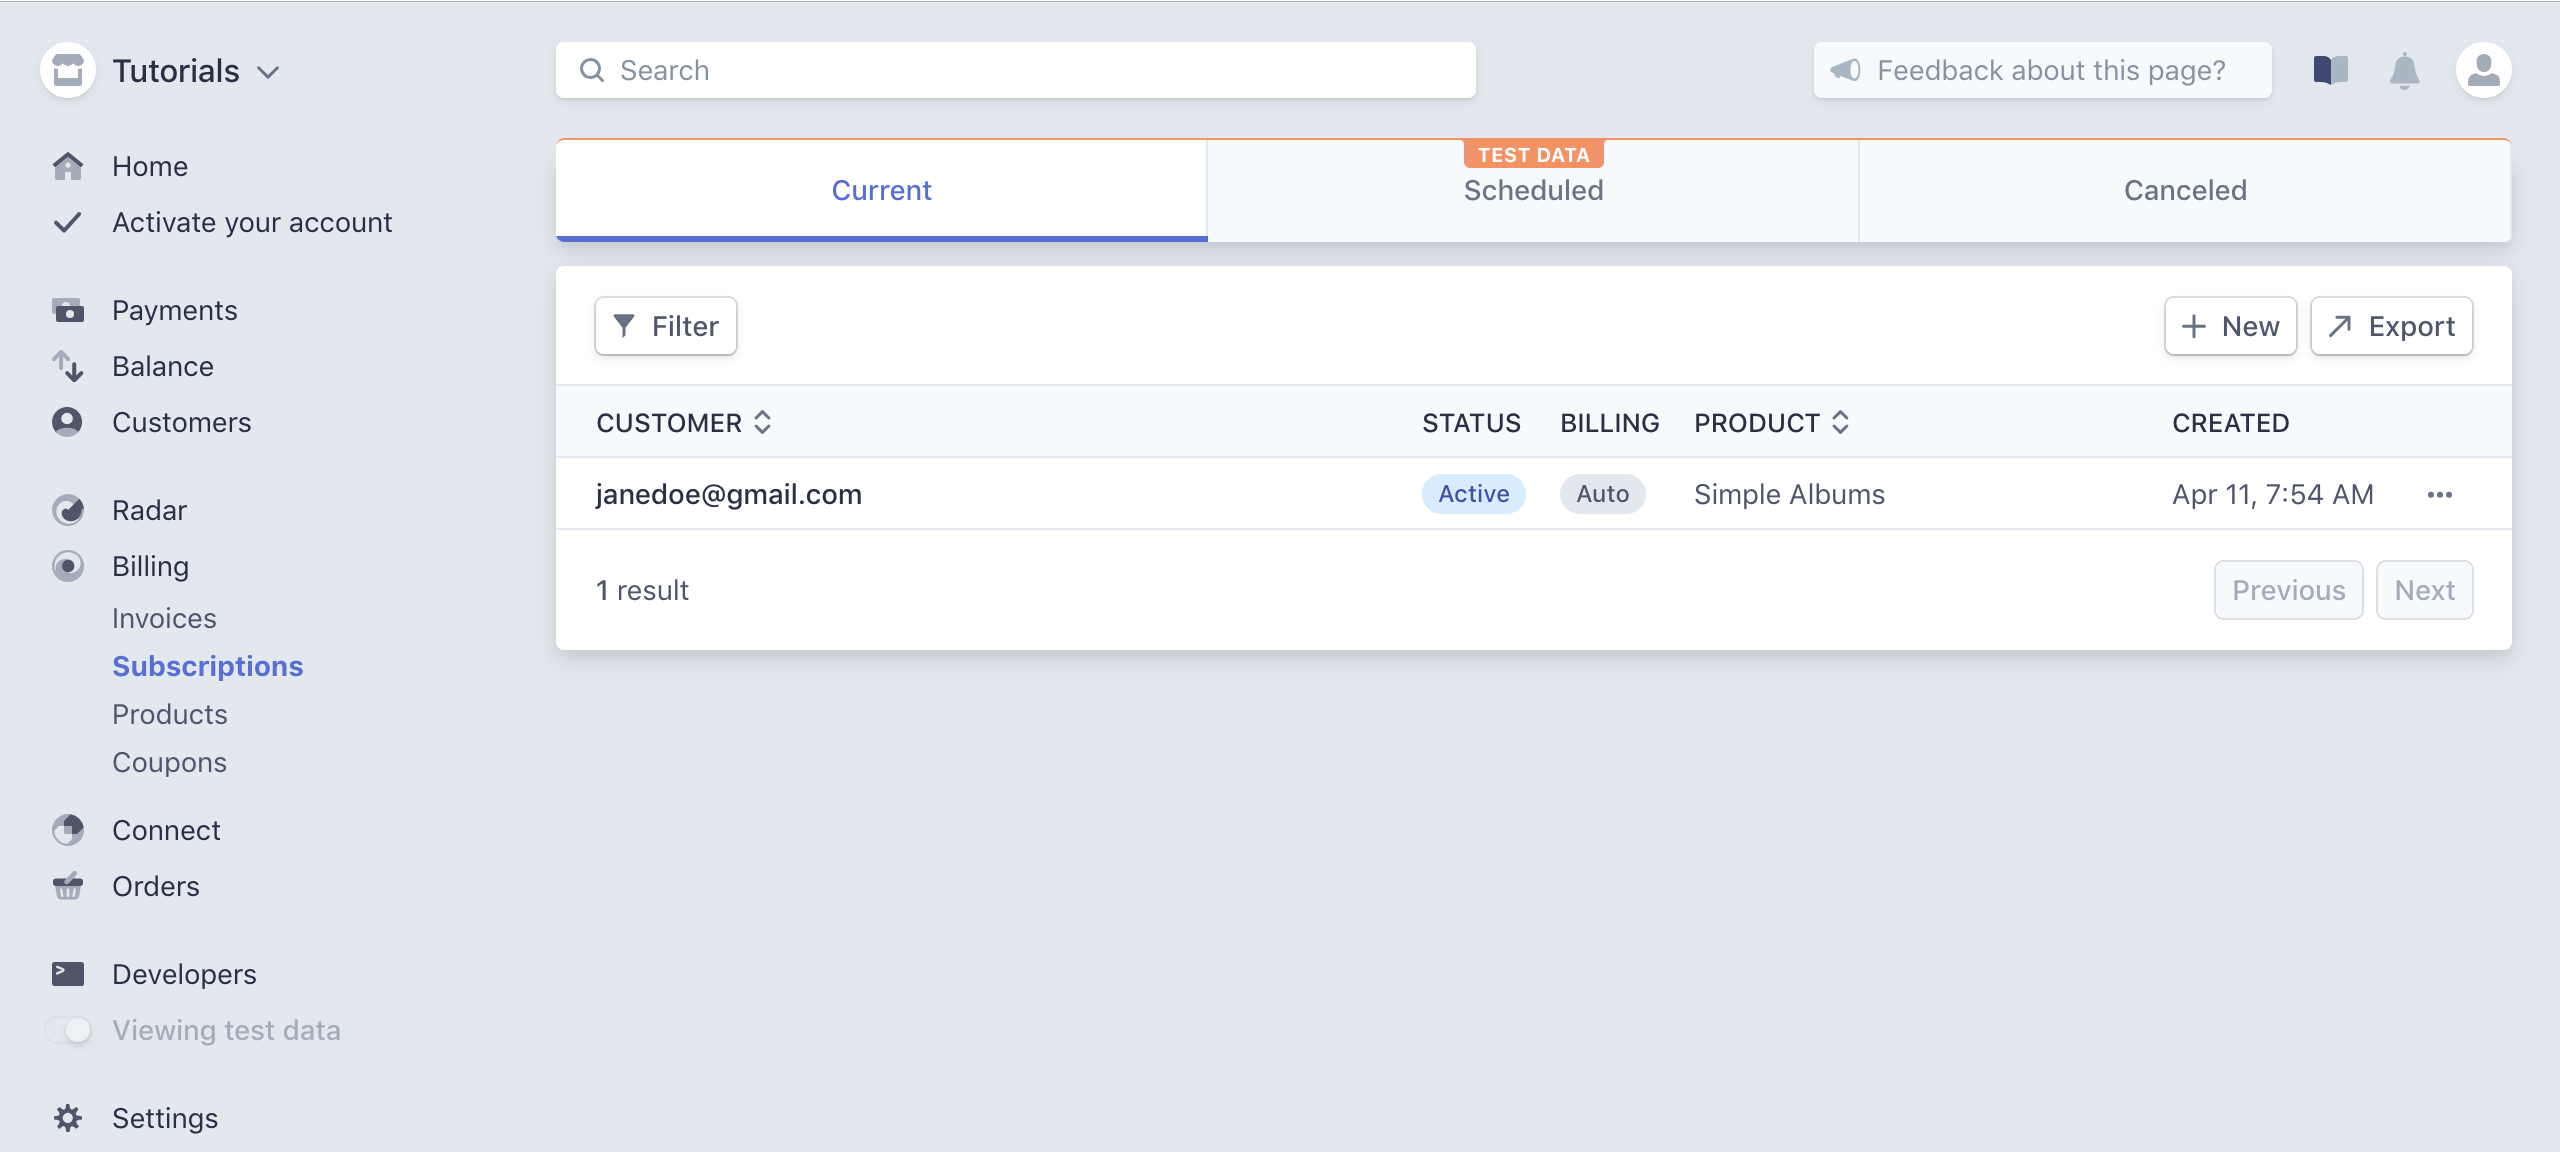
To verify if a Customer and Subscription have actually been created, navigate to your Stripe Dashboard.
In the sidebar, click on "Billing", and once expanded, click on "Subscriptions". You should now see the following:
If you click on the Customer, you'll get a more detailed view:
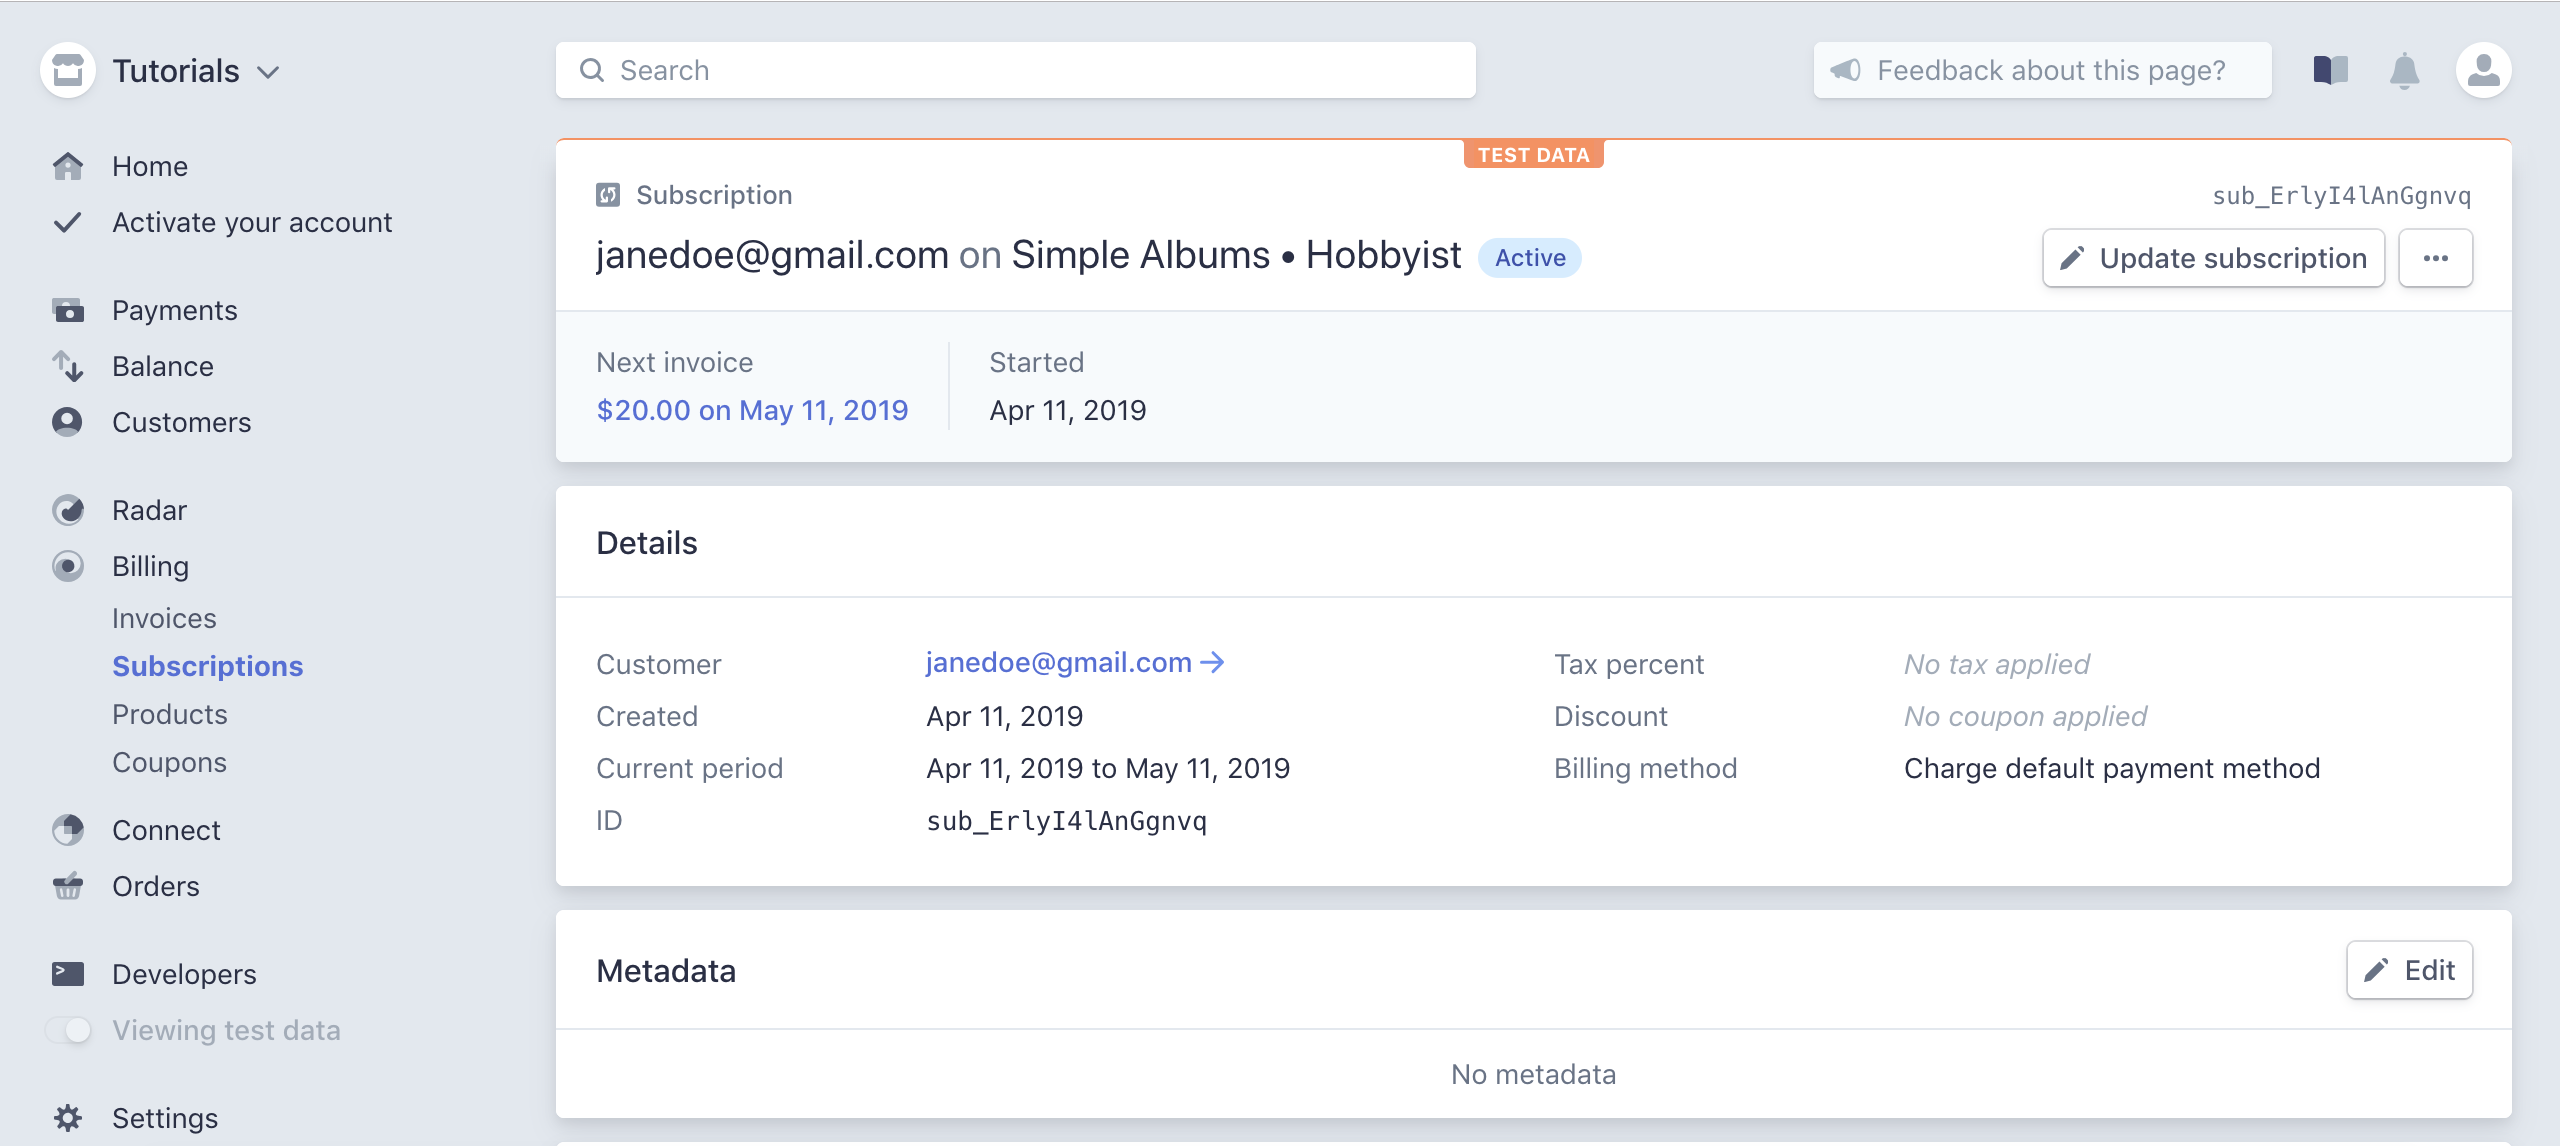
And that's it! You've created your first recurring subscription with Stripe! Congratulations on making it this far!
8. Next Steps
So far, we've been developing everything in a test environment. The next steps would be to set up your application for a live/production environment.
You'll need to
- Activate Your Account
- Switch out your test Stripe Secret Key and Stripe Publishable Key for live versions
- Serve your site over HTTPS to keep payment information safe and uncompromised
If you're interested in these next steps and would like a more detailed guide, please let us know!
Want to read this all in one place?
Sign up for our mailing list below and get a free PDF version of this 3-part series with bookmark navigation!
